Posts Tagged ‘monitor’
Common Mistakes When Building A Computer
Building your own desktop computer has had a surge in popularity recently. It’s a great project and fairly doable IF you follow certain protocols AND do thorough research BEFORE you make the attempt. We get “self builds” in for repair regularly because they didn’t work after assembly. It can be something simple like plugging in a cable wrong, installing unsupported RAM (specifically AMD systems), or it could be a worst-case scenario of shorting out the motherboard and processor. In this article we will spotlight some common mistakes made and how to avoid them!
Getting incompatible hardware – This is one of the most common mistakes to make when building a computer. From the physical size of the components to how much power will be needed, to the type and number of drive bays you want. Finding out your CPU won’t work with your motherboard in the middle of a build can be a serious headache. A good way to avoid that hassle is to go over your list with a trusted professional like Geek Easy before making your purchases. We are experts in build compatibility! Even if you use an online tool that is supposed to determine hardware compatibility, it’s always best to check with the motherboard manufacturer for their qualified vendor list (QVL) of supported processors and RAM.
Buying a cheap, underpowered PSU (power supply) – This should really be addressed during the compatibility phase, making sure your PSU has enough power for your desired setup. Most techs will tell you not to cheap out on the power supply which is typically sound advice. However, it should be noted that there are decent, affordable power supplies available and most systems don’t need a 1200w power supply to run well. But if you buy something smaller than 500w that weighs as much as a ball of tinfoil, you could easily run into issues later on due to cheap, unreliable components inside the power supply. Your power supply provides electricity for the whole system, so trying to power a $600 graphics card with a $25 power supply isn’t the best idea. What’s right for you depends on your budget and the components you are putting into your build.
Slotting your RAM incorrectly – Not seating your RAM properly can end up with your build not booting. RAM has a specific way it has to be installed in the DIMM slots. Check out the pins on your stick of RAM. Notice that it’s not split 50/50? If the motherboard slots are compatible, they will have a matching “split”. If your RAM isn’t lined up correctly you can easily cause damage to the stick itself and/or the DIMM slot. When installing RAM, use even pressure on both ends until you hear the stick *click* into the slot. If you didn’t hear any clicks while installing your RAM, chances are it’s not seated fully – just give it another push and you should be good to go.
Installing the CPU incorrectly – This is the most important one and more common than you’d think. Some beginners aren’t aware that processors must be installed in a specific orientation. All Intel processors will have some kind of marking on one of the corners. On AMD chips it’s a gold arrow usually found on the bottom-left corner. Line that up with the marking on your motherboard’s CPU socket, often on the metal part that secures your CPU down, but sometimes this indicator is found on the board itself. Great care should be taken when installing a CPU since bent\broken pins are not covered by manufacturer warranties and can make your system inoperable. Take it slow when installing your processor and it can save you time and money spent replacing the motherboard or CPU.
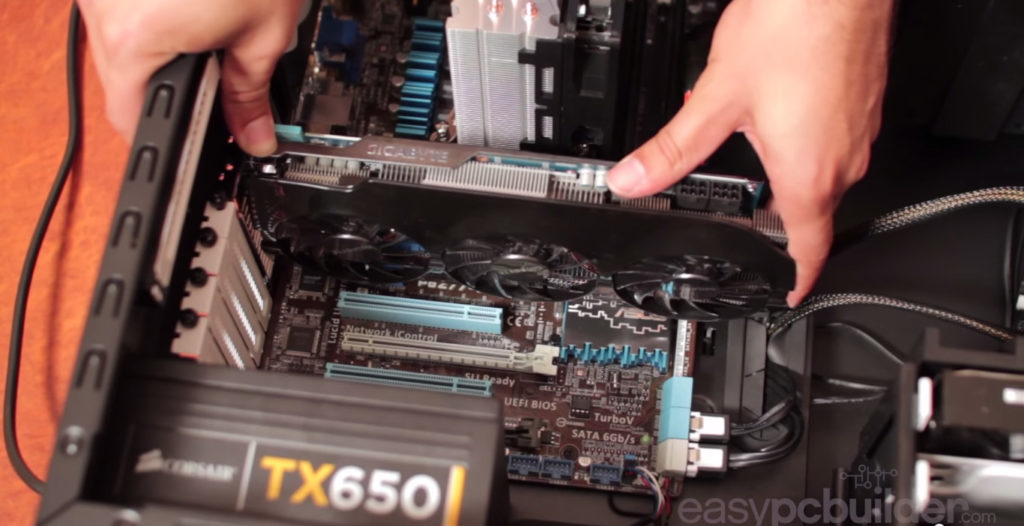
Plugging your monitor into the wrong display output – You get the computer all assembled and finally turn it on. Everything sounds normal and appears to be powered on, except there’s no video. What’s wrong? Another super common mistake is plugging your monitor into the motherboard’s integrated video port instead of the port on your graphics card. The video ports on motherboards only work with processors that come with integrated graphics and typically only work if you don’t have a GPU installed. Simply plug your monitor into a port on the graphics card and reboot. If that doesn’t fix it, make sure you have connected all needed power cables from the power supply. If your card has 2 PCI-E power slots on it, the card requires those to run. You may need to purchase adapters or a larger power supply if there aren’t enough power cables to feed your GPU.
Hopefully these tips will help you if you venture into building your own computer! We are always here to answer questions and to help make your technology easier! If building your own computer isn’t something you want to tackle, ask us about our custom build services!
 | Adonis Pointer is a photographer, a collector of vintage razors, and a certified technology greek! Adonis has been involved in computer technology since well, a LONG time! He has been involved in nearly every aspect of the industry from sales to repair to training to consulting. As the Social Media Manager he writes the majority of the posts on the Geek Easy Computers blog. |
Video Technology
Computer technology seems to change over night at times. One aspect of that technology that confuses many people are the video connection standards. There’s a few of them and they are constantly evolving. In this post we hope to clear up a little of that confusion.
The History
Let’s go back to the beginning of consumer computing, and explore how it’s evolved from there.
CGA (Color Graphics Adapter) – First available on the IBM PC in 1981 as IBMs first color display card, thus the first color display standard. It only used 16 kilobytes of memory and displayed at 640×200 @ 60mHz 4-bit or 16 colors. It connected using a DE-9 (9-pin) connector.
EGA (Enhanced Graphics Adapter) – The next leap in display standard evolution. Introduced in 1984 by IBM, it displayed at 640×350 @ 60mHz & 16 colors. This graphics card had 64KB of onboard ram. It also connected using a DE-9 connector.
VGA (Video Graphics Array) – This is the video connector that most computer users are familiar with. Introduced in 1987 by IBM with the debut of their x86 computers. Connected with a DE-15 (15-pin) connector, VGA was the last of the analog video standards to be developed. It displayed up to 2048×1536 @ 85mHz and 256 colors.
Here and Now
DVI (Digital Visual Interface) – Developed by Digital Display Working Group in 1999, this standard could be configured be configured to support multiple modes such as DVI-A (analog only), DVI-D (digital only) or DVI-I (digital and analog). Featuring support for analog connections, the DVI specification is compatible with the VGA interface. DVI has a unique horizontal connector that .varies slightly depending on the configuration. It can display 2560×1600 @ 60mHz or up to 3840×2400 @ 33mHz.
HDMI (High-Definition Multimedia Interface) – HDMI is currently gaining traction as the de facto video connection on desktops, notebooks, and even mobile devices. HDMI is a digital replacement for analog video standards. It can transport compressed, uncompressed, video and audio, and auxiliary data. Different versions of HDMI have been deployed since the initial release but all use the same cable and connector. Other than improved audio and video capacity, performance, resolution, newer versions have optional advanced features such as 3D, and Ethernet data connection. Displaying 2560×1600 @ 75mHz or 4096×2160 @ 60mHz, HDMI uses a much smaller connector than DVI.
DisplayPort – A digital display interface (designed by VESA – Video Electronics Standards Association) primarily used to connect a video source to a device such as a computer monitor, though it can also be used to carry audio, USB, and data. DisplayPort was created to replace VGA & DVI, and is backward compatible with VGA, DVI and HDMI using the appropriate adapters. It can display 2560×1600 @ 75mHz or up to 8192×4320 @ 60mHz. DisplayPort uses a 20pin connector.
Mini DisplayPort (Thunderbolt)
If you’re using an Apple computer, new systems come with Mini DisplayPort. Mini DisplayPort is the same connector as Intel Thunderbolt technology allowing that port on new Macs to do more than just video. It’s used in Apple Cinema displays and has adapters for DVI, VGA, HDMI or regular DisplayPort. Mini DisplayPort uses a small 20-pin connector seen on Apple devices and some PCs and PC graphics cards.
Your Computer
Today’s computers, both laptops and desktops typically are coming with HDMI or DisplayPort as video connection options. You can still find DVI and VGA on some models but it is quickly being phased out by the new, more powerful digital standards. Flat screen TV technology has also embraced these digital standards for connecting not only your computer but other devices to your TV.
We hope that this information has made understanding the video connection varieties a bit easier. If you have further questions about this topic or any other, feel free to email us, call us, or contact us through the website.
Geek Easy Computers wants to make your technology easier!
 |
Adonis Pointer is a photographer, a collector of vintage razors, and a certified technology geek! Adonis has been involved in computer technology since well, a LONG time! He has been involved in nearly every aspect of the industry from sales to repair to training to consulting. As the Social Media Manager he writes the majority of the posts on the Geek Easy Computers blog. |